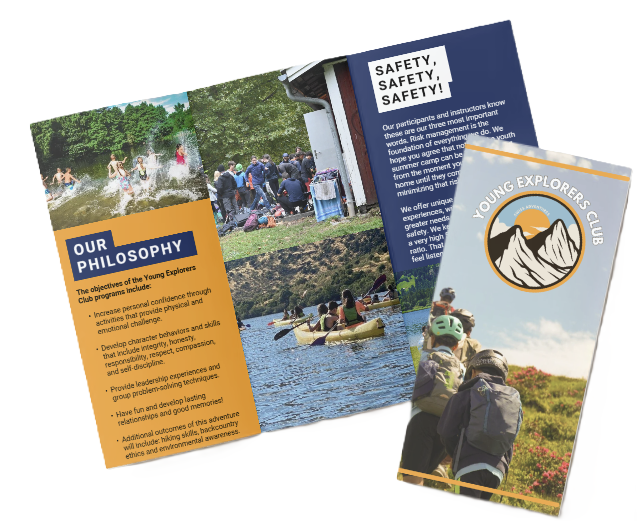
The Best Ways To Display Camp Certificates And Awards
Display certificates & awards to boost camper confidence, archival frames, shadow boxes, cork or digital displays for safe recognition
Displaying Certificates and Awards
Displaying certificates and awards raises camper confidence and strengthens camp culture. It also gives programs visible social proof. Showing awards forces choices that balance protection, visibility, and cost. Below are practical recommendations and best practices.
Recommended Display Mix
Formats
-
Custom frames for heirloom diplomas and long-term preservation.
-
Shadow boxes for medals, ribbons, and three-dimensional items.
-
Rotating cork or peg boards for frequent, low-cost updates.
-
Digital frames to rotate images space-efficiently and reduce physical wear.
Preservation Best Practices
-
Use archival supplies: acid-free mats and backing, polyester (Mylar) sleeves, and museum-grade UV glazing.
-
Don’t laminate originals; lamination is irreversible and damages paper over time.
-
Control environment: keep stable humidity and avoid direct sunlight; use UV-filtering glazing where light exposure is possible.
Installation & Safety
-
Install displays at child-viewing heights to boost engagement and pride.
-
Choose anchors by weight—use toggle bolts or appropriate anchors for heavy frames; follow manufacturer weight ratings.
-
Prefer shatterproof glazing (acrylic or polycarbonate) in active areas to reduce risk.
-
Use safe hanging hardware and secure fasteners so displays remain stable during high traffic.
Archive & Share Responsibly
-
Scan originals at 300–600 dpi for archival-quality digital copies.
-
Use clear, consistent file names and maintain both cloud and local backups.
-
Obtain parental consent before posting campers’ names or photos online or in public displays.
Key Takeaways
-
Planned public displays boost camper pride, encourage positive behavior, and provide clear social proof for programs.
-
Use a mix of formats: custom framing for long-term protection, shadow boxes for three-dimensional items, cork or rotating boards for frequent updates, and digital frames to rotate space-efficiently.
-
Preserve originals with archival supplies like acid-free mats and backing, polyester (Mylar) sleeves, and museum-grade UV glazing. Don’t laminate originals.
-
Install accessibly and safely: hang at child-viewing heights, choose anchors by weight or use toggle bolts for heavy frames, and use shatterproof glazing in activity areas.
-
Archive and share responsibly: scan at 300–600 dpi, use clear file names, keep cloud and local backups, and get parental consent before posting campers’ names or photos.
https://youtu.be/4yjhBlgkw1U
Why Display Certificates and Awards
We, at the young explorers club, treat camper recognition as intentional. Displaying certificates and awards boosts camper self-esteem, records achievement, reinforces camp culture, and doubles as social proof for our programs. Visible achievements tell a clear story: effort matters here.
Public recognition has measurable behavioral effects. When we highlight accomplishments in public spaces or online galleries, campers feel seen and are more likely to repeat positive behaviors. That feedback loop helps leaders encourage cooperation, persistence, and leadership without extra lecturing.
Practical placement and preservation
Quick facts and where to put them
- Standard certificate sizes: 8.5 x 11 in (US Letter) and A4. Frame to those sizes for a clean, professional look.
- Medal and ribbon displays: allow 1.5–3 in of shadow box depth so medals sit without bending.
- Adult viewing guideline: hang the centerline of artwork at about 57–60 in from the floor for balanced gallery walls.
- Kid-friendly centerlines: lower displays to roughly 42–48 in so children view at eye level and feel ownership.
- High-traffic entryway — high visibility and public marketing; perfect for camp-wide awards and seasonal highlights.
- Cabin wall — intimate and camper-focused; ideal for achievement display that motivates peers.
- Digital gallery — wide reach and shareable; we use online albums and highlight reels to extend recognition beyond camp. For ideas on capturing moments that translate well online, see creating lasting memories.
We preserve awards with simple rules: use acid-free mounts for paper certificates, avoid direct sunlight on framed pieces, and secure shadow boxes with wall anchors for high-traffic areas. We balance award preservation with active display so certificates stay both safe and meaningful.

Top Display Methods: Frames, Shadow Boxes, Bulletin Boards and Digital Screens
We prioritize preserving awards while keeping displays engaging. For certificates we weigh cost, protection and presentation.
Frames — pre-made vs custom
Pre-made frames work when you want speed and low cost. They come in common sizes like 8×10, 11×14 and 16×20 and usually cost between $5 and $40. Big-box and craft stores like IKEA RIBBA, Michaels or Walmart carry plenty of styles. Use a neutral mat if you want a cleaner look without custom work.
Custom framing gives certificates museum-grade protection and a refined look. We opt for archival matting and museum glazing when longevity matters. Expect common certificate sizes (11×14 or 16×20) to run about $80–$350 for custom framing. Glazing choices matter:
- Regular glass — cheapest.
- Acrylic (plexi) — lighter and often 10–30% more than basic glass.
- Museum glass / museum acrylic — can block up to about 99% of UV; choose this for awards you want to protect long-term.
Shadow boxes and 3D displays
Shadow boxes are ideal for medals, badges, pins, folded flags and multi-item diplomas. Measure each item (H x W x D) before buying.
Recommended depths:
- 1.5–3 in for medals and small gear.
- 3–4 in for bulkier items.
Pick a box about 1/2–1 in deeper than the item depth when possible. Materials should include archival backing and acid-free foam or mat board. Expect prices from roughly $25 to $200 depending on size and materials.
Mounting tips:
- Measure first, then use acid-free mounting tape, sewing pins through the backing, or custom mounts.
- Avoid adhesives that touch originals.
- Consider vendors like ArtToFrames and use Lineco archival hinging tape for paper.
Bulletin boards and rotating displays
Cork or felt boards give flexibility for seasonal displays and quick updates. Common sizes are 2×3 ft and 3×4 ft; large boards typically cost $15–$75. We rotate featured campers weekly or monthly to keep recognition fresh and encourage participation. Use push pins with small labels to add names, dates and short notes about the achievement.
Digital display options
Digital photo frames and small screens let you rotate certificates, photos and short video clips. Consumer prices generally range from $50–$300. Scan certificates at a minimum of 300 dpi and use 600 dpi for archiving or high-detail prints. Digital displays solve space limits and let you spotlight multiple campers without extra wall space. You can also document camp experience by pairing scans with photos and short captions.
Practical mounting and preservation tips
We follow a short checklist before committing to any display:
- Measure the item and the available wall or shelf space.
- Choose acid-free or archival materials for anything that touches paper or textiles.
- Match glazing to the expected light exposure: go museum-grade for sunny rooms.
- Use removable mounts when possible so originals stay unharmed.
- Keep medals and textiles out of direct sunlight and away from humid spots.
Quick comparisons and recommendations
- Pre-made frame — low cost ($5–$40), fast, limited UV protection; good for short-term displays.
- Custom framing — higher cost ($80–$350), archival matting and museum glass for long-term protection; professional finish.
- Shadow box — best for 3D award display; depth 1.5–4 in; cost $25–$200; use acid-free backing and non-adhesive mounts.
- Cork board display — flexible rotating recognition; common sizes 2×3 ft or 3×4 ft; cost $15–$75; ideal for weekly or monthly features.
- Digital frame — rotate many certificates and photos; scan at 300–600 dpi; price $50–$300; great for limited wall space.
Recommendation: use a mixed approach — custom frames for heirloom diplomas, shadow boxes for medals and badges, cork boards for active recognition, and a digital frame to rotate highlights. Follow the mounting advice above and choose materials that protect the awards while showing them off.

Protecting and Preserving Certificates (Archival Care)
We keep certificates safe with practical archival preservation steps that stop fading, yellowing and physical wear. Good care starts with the right materials and simple routines.
Preservation essentials
Use the following essentials when storing or framing certificates:
- Use acid-free mats and backing and pH-neutral mat board for framing to prevent acid migration and yellowing over time.
- Choose UV-filtering glazing—museum-grade glazing can block up to ~99% of UV—to protect ink and pigments from light damage.
- Place certificates in polyester (Mylar) sleeves for handling and storage; polyester sleeves are available in common sizes like 8.5 x 11 and 11 x 17.
- Store and display paper artifacts at relative humidity (RH) of 30–50% and a temperature around 65–70°F (18–21°C).
- Avoid lamination entirely; lamination is irreversible and can trap acids and adhesives. Prefer encapsulation in archival polyester (Mylar) sleeves.
Handling, mounting, monitoring and product checks
We handle certificates with clean, dry hands or wear cotton or nitrile gloves to avoid oils and dirt. Always slide a certificate into a Mylar sleeve before moving it; sleeves cut direct contact and reduce handling stress. For framing, hinge with archival tape or use corner mounts so the document sits on acid-free mat board. Never stick pressure-sensitive tape directly to the document surface.
We monitor environment and storage with inexpensive hygrometers that cost about $10–$30; place one where certificates are stored and check it weekly for fluctuations. If humidity drifts outside 30–50% or temperature moves far from ~65–70°F (18–21°C), adjust HVAC or use a dehumidifier/humidifier as needed.
We advise checking product labels for the words “acid-free,” “archival,” and “lignin-free” before you buy mats, backing or sleeves. Proven archival supplies we use include Lineco archival tape, Gaylord Archival boxes and Hollinger Metal Edge boxes. For framing glass, choose museum-grade glazing for maximum UV protection.
For tips on documenting and preserving camp achievements, see our resource on archival preservation.

Layout, Aesthetic and Installation Safety
We, at the Young Explorers Club, lead with the most recent or most prestigious awards to create a clear visual hierarchy. We then arrange by theme (sports, arts, leadership) or by age group so viewers can scan quickly. Maintain consistent margins: 1–2 in inside frames for small items and 2–3 in for museum mats. Keep spacing between frames at 2–3 in for a balanced gallery wall.
Example measurement and mock calculation: a 3×3 gallery of 11×14 frames spaced 2 in apart. Each frame clear width ≈ 11 in. Total wall width ≈ 3×11 + 2×2 = 37 in, plus side margins. We always add at least 1–2 in side clearance for visual breathing room.
We include captions with camper name, award type, date, and an optional short note from a counselor. Use legible sans serif fonts for captions and set sizes between 12–16 pt for readability. Short, consistent captions help stories land. For wording ideas and documentation tips see documenting camp.
We choose mounting hardware based on frame weight and wall type. For drywall we use anchors rated for 10–25 lb for light to medium frames. Toggle bolts handle heavier work and support 25–100+ lb loads. Command Strips can work for very light frames but avoid them in humid cabins; small strips hold ~1 lb, medium ~4 lb, and large roughly 7.5–16 lb depending on the product. We fit D-rings and hanging wire on frames over ~10 lb and reserve sawtooth hangers for small frames under ~5–10 lb. For camp areas we favor shatterproof acrylic glazing to keep kids safe.
We follow these spacing and aesthetic rules to preserve a coherent look: align tops or centers across rows, stagger vertically when mixing sizes, and maintain at least 0.5–1 in internal margins around medals or small artifacts. We balance color and matting by repeating one or two mat colors across the display.
Installation checklist and troubleshooting
Follow this step-by-step checklist before and during installation:
- Measure and mark the centerline at your desired height; mark frame centers before drilling.
- Use a level and mark both hanging points for heavier frames; two contact points reduce sway.
- Choose anchor type by weight: drywall anchors for 10–25 lb; toggle bolts for heavier items.
- Install D-rings with hanging wire on frames over ~10 lb; use sawtooth hangers for very small pieces.
- If a frame sags, re-check anchor type and upgrade to a toggle or higher-rated anchor.
- In humid cabins avoid raw wood frames; select sealed wood or acrylic options to prevent warping.
- For child-safe installations use shatterproof acrylic glazing and secure lower-edge fasteners to prevent tipping.

Budgeting, Product Recommendations and DIY Low-Budget Builds
We organize options by clear price bands so leaders and parents can pick what fits their display budget. Practical choices range from simple foamcore mounts to museum-grade framing; each choice affects longevity and presentation. We recommend mixing low-cost displays with one premium piece for milestone awards.
We favor these vendors and products for reliability and value:
- Framing: IKEA RIBBA frames, Framebridge, Michaels custom framing, ArtToFrames, FramesRUs
- Glazing & preservation: Tru Vue Museum Glass, Optium Acrylic, Lineco archival tape and Mylar sleeves
- Shadow boxes / deep frames: ArtToFrames shadow boxes, Frame Depot and IKEA deep frames
- Hanging & installation: 3M Command Strips, D-rings, wire hangers, toggle bolts, molly bolts
- Digital rotation: Nixplay Smart Digital Photo Frame, Aura Carver/Mason, Skylight Frame
- Long-term storage & scanning: Gaylord Archival boxes, Hollinger Metal Edge boxes, acid-free folders, foamcore backing, a hygrometer, Epson Perfection scanner series
Cost breakdown and quick DIY rotating wall
Below are concise budgets and a step-by-step inexpensive build you can assemble for under $50.
- Low budget (<$50 per display): pre-made 8.5×11 frame ~$10; print certificate $1–$2; backing/installation $10–$20. Foamcore costs ~$5–$15; packs of 20 clothespins $4–$10.
- Mid-range ($50–$150): 11×14 pre-made/custom mat $40–$90; acrylic glazing $20–$40; include hardware and nicer backing.
- Premium ($150–$400+): custom frame with museum glass and archival mat $150–$350; shadow box for 3D award adds $100–$200.
- Low-cost ideas you can implement today: printable mats, string/clothesline with clips, foamcore backing and clear acrylic frames—these keep per-item cost under $50.
DIY rotating wall (simple):
- Prepare the backing: Paint a sheet of plywood or foamcore to match camp colors.
- Install rows: Attach twine or thin rope in horizontal rows spaced 6–12 inches apart.
- Add clips: Clip certificates with clothespins or binder clips spaced 2–3 inches apart.
- Labeling: Add small label tabs for camper names so viewers can quickly scan who earned what.
- Mix in a premium piece: Reserve one framed/matted display (with museum glass if possible) for milestone awards to elevate the wall.
Lamination warning: Do not laminate original documents. Laminate photocopies only if you must display a durable copy; store originals in archival boxes.
We suggest pairing a physical wall with a digital slideshow for events and parent viewing. For motion-friendly displays use Nixplay or Aura and feed images via Google Photos or the vendor app. We, at the young explorers club, often link display tips with creating lasting memories to help families preserve context as well as certificates. For quick mounts choose Command Strips for rentals and D-rings or toggle bolts for permanent walls; upgrade glazing to Tru Vue Museum Glass or Optium Acrylic when preserving high-value awards.

Measuring Success, Digital Best Practices and Caption Templates
We track display engagement across web and social: likes, comments and shares tell me what resonates. At the Young Explorers Club I also measure in-person interaction — time spent near displays, rotation requests and sign-ups to be featured. Program impact comes from camper pride surveys and parent satisfaction surveys. Use these three lenses together to form display analytics and social proof.
Set clear targets and run tests. I recommend weekly highlight posts aiming for 10–20% more likes than your channel average. Run simple A/B tests — photo-only versus captioned recognition — and look for a 10–30% uplift in engagement metrics. Log results and iterate every month. Digital frame placements should be treated like social posts; compare views and interactions to other displays to measure real-world impact.
Scanning, file guidelines and backups
Below are the standards I use for long-term archiving and easy retrieval:
- Scan resolution: minimum 300 dpi; 600 dpi if you plan to archive or print historically. This helps when you scan certificates and awards for high-quality use.
- File types: save as high-quality JPEG for images and PDF for clarity and distribution. Prefer PDF when you need to preserve searchable text and consistent layout.
- Naming convention: Year_CampName_CamperName_AwardType.pdf (example: 2026_SunriseCamp_JaneDoe_LeadershipAward.pdf).
- Backups: keep both cloud and local copies. Use one cloud provider and one encrypted local drive to avoid single-point failures.
- Metadata: embed camper name, award type and date in file properties to aid display analytics and internal searches.
Post cadence, creative format and privacy
I suggest a weekly posting cadence for social media recognition and digital frames. Use consistent hashtags — camp name + #CamperAwards — and add a camp logo overlay on templates for brand continuity. Keep caption templates ready and rotate between short and longer formats to maintain social proof.
Consent and safety come first. Obtain parental consent before posting any camper photos or names. Store signed permissions with the scanned certificate file.
Caption templates you can copy and use
- Short: [Camper Name] — Leadership Award — [Camp Name] 2026. Proud of your growth! #CampNameAwards
- Longer: [Camper Name] earned the Leadership Award after leading morning activities for Cabin 5. Congratulations — your initiative helped X campers. — [Counselor Name]
For tips on documenting moments and visual ideas, see creating lasting memories.

Sources
National Archives — Preserving Family Papers and Photographs
Library of Congress — Preservation Basics
Tru Vue — Why Use Museum Glass?
Framebridge — How Much Does Framing Cost?
The Spruce — How Much Does Custom Framing Cost?
IKEA — RIBBA frame (product page)
Lineco — Archival supplies and mounting materials
Gaylord Archival — Preservation products & guidance
Nixplay — Digital photo frames


 18")