How to Pack for Outdoor Activities: Family Guide
Learn how to pack for outdoor activities with our family guide. Master essential gear selection for comfort and safety on every adventure!
TL;DR:
- Proper outdoor packing hinges on selecting essential gear, distributing weight correctly, and organizing items for quick access. Using the three-zone system, color-coded bags, and following the Ten Essentials improves safety, comfort, and efficiency during outdoor adventures. Avoid overpacking, improper weight distribution, and neglecting gear fit to ensure a successful and enjoyable trip.
Packing for outdoor activities is the process of selecting and arranging essential gear strategically to ensure comfort, safety, and readiness for changing conditions. Get it wrong and you are either hauling a pack that destroys your back or scrambling for rain gear in a downpour. Get it right and the whole trip changes. Whether you are planning a day hike in the Alps, a family camping weekend, or a multi-day expedition, the principles of smart packing stay consistent: prioritize the right gear, distribute weight correctly, and keep critical items within reach.
How to pack for outdoor activities: the essential gear list
The U.S. National Park Service mandates carrying the “Ten Essentials” for emergency preparedness in any outdoor setting. This framework covers navigation tools, sun protection, insulation, illumination, first aid, fire starting, repair tools, nutrition, hydration, and emergency shelter. It is the most widely recognized outdoor gear checklist in the world, and for good reason. Every item on that list has saved lives.
Beyond the Ten Essentials, your gear needs shift depending on the activity type and duration. Here is how the categories break down across trip types:
| Gear Category | Day Hike | Overnight Trip | Extended Expedition |
|---|---|---|---|
| Navigation | Map and compass | Map, compass, GPS | GPS, satellite communicator |
| Hydration | 2 liters minimum | 3+ liters or filter | Water filter and purification tabs |
| Shelter | Emergency bivy | Tent or tarp | Four-season tent |
| Clothing layers | Base and outer | Base, mid, and outer | Full layering system |
| Nutrition | Snacks and lunch | 1.5 days of food | Full caloric planning |
| First aid | Basic kit | Expanded kit | Wilderness first aid kit |
Active hikers need to carry at least 3 liters of water per day, and UV exposure increases by 4 to 5% for every 1,000 feet of elevation gain. That second fact matters more than most people realize. A family hiking at 8,000 feet in Switzerland faces UV radiation roughly 30 to 40% stronger than at sea level, which means SPF 50 sunscreen, UV-blocking sunglasses, and sun hats are not optional extras.
Clothing deserves its own attention. The three-layer system is the standard: a moisture-wicking base layer like Merino wool or synthetic fabric, a mid-layer for insulation such as a fleece or down jacket, and a waterproof outer shell. Prioritize multi-use moisture-wicking layers over bulky single-use items. A Merino wool base layer that works for hiking, sleeping, and town stops is worth three times its weight in versatility.

How do you organize a day pack for comfort and efficiency?
The three-zone packing system is the most effective method for organizing a backpack, and it applies whether you are carrying a 20-liter day pack or a 65-liter expedition pack. Each zone serves a specific purpose, and violating the logic of any zone creates problems on the trail.
Here is the system, step by step:
- Bottom zone: Place bulky but lightweight items here. Sleeping bags, puffy jackets, and camp shoes belong at the base. These items are rarely needed mid-hike, so burying them is fine.
- Middle zone (core): This is where your heaviest items go, packed as close to your spine as possible. Food, water reservoirs, a tent body, and cooking gear all belong here. The heaviest items positioned near the spine between the shoulder blades prevent discomfort and maintain balance on uneven terrain.
- Top zone: Rain gear, snacks, a first aid kit, and your headlamp live here. You need these fast, and you should never have to dig for them.
Backpack weight for short trips should target 20% of your bodyweight, with a maximum of one-third for longer treks. That means a 150-pound adult should carry no more than 30 to 50 pounds on a multi-day trip. Most recreational hikers carry too much, not too little.
Up to 70% of a backpack’s weight should be supported by the hips via the hip belt, not the shoulders. Adjust your hip belt first, then snug the shoulder straps, and finally tighten the load lifter straps. Skipping this sequence is the single most common cause of shoulder pain on long hikes.
Color-coded dry bags improve organization and waterproofing by allowing quick identification without unpacking under difficult conditions. Assign one color per category: blue for clothing, red for first aid, yellow for food. When it starts raining at mile eight, you will find your rain jacket in seconds instead of minutes.

Pro Tip: After loading your pack, tighten all compression straps to remove empty space and pull the load close to your body. A loose, floppy pack shifts with every step and multiplies fatigue.
Before you leave the trailhead, test your pack balance by standing it upright and checking that it does not tip sideways. A pack that leans is a pack that will fight you for eight hours. Adjust heavy items toward the center and retighten compression straps until it stands true.
What are the best packing strategies for families and groups?
Family and group packing requires a different logic than solo packing. The goal shifts from personal optimization to collective efficiency, and the stakes are higher because one person’s poor packing decision affects everyone.
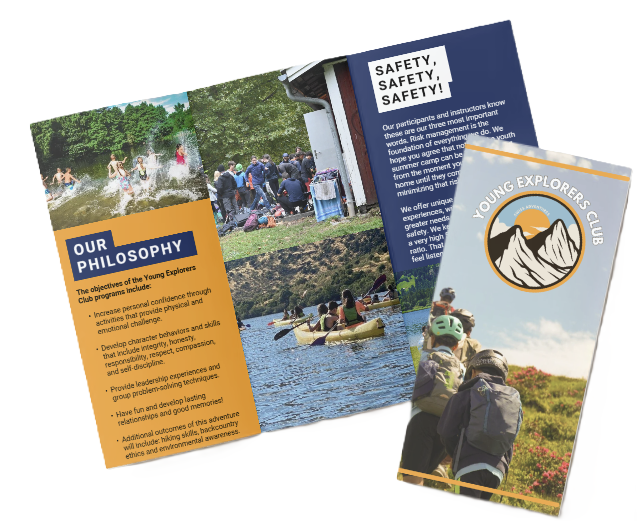
The smartest approach is to divide group gear by weight capacity, not by item type. A strong adult carries the tent and cooking system. Older teens carry their own sleeping bags and clothing. Younger children carry only their personal hydration, snacks, and a light layer. Youngexplorersclub applies this exact principle across its outdoor programs in Switzerland, where participants from different age groups share gear loads based on ability rather than age alone.
Key strategies for family and group packing:
- Share group gear by load capacity. Distribute tents, stoves, and water filters across the strongest carriers. Never let one person carry all the communal gear.
- Pack children’s essentials at the top. Sunscreen, snacks, a first aid kit, and a whistle should be immediately accessible in a child’s pack or a parent’s top pocket.
- Use a pre-trip checklist. Ruthless packing, focusing only on daily or every-other-day items, cuts unnecessary weight and improves mobility for every group member.
- Assign a communication device to one adult. A fully charged phone or a personal locator beacon like a Garmin inReach should stay in the most experienced adult’s top pocket.
- Practice packing before the trip. Have kids load their own packs at home and walk around the block. This reveals fit issues, weight problems, and forgotten items before you are at the trailhead.
Pro Tip: When packing for children, apply the youth adventure camp rule: if a child cannot carry their pack for 10 minutes without complaining, it is too heavy. Reduce weight before the trip, not during it.
Group outings also benefit from a shared snack rotation. Rather than every person carrying their own food supply, designate one pack as the communal snack bag and rotate it among adults. This keeps caloric intake consistent and prevents the situation where one child eats all their food by mile two.
What packing mistakes should you avoid on outdoor trips?
Most outdoor trips go wrong before they start. The errors happen at home, during packing, and they compound on the trail.
The most damaging mistakes are:
- Overpacking “just in case” items. Every item you add that you do not use daily or every other day is dead weight. A second pair of hiking boots, three books, and a full-size towel are classic offenders.
- Burying rain gear. Waterproof jackets and pack covers must live in the top pocket or an external pocket. Digging through a full pack in a sudden rainstorm is both miserable and dangerous.
- Ignoring weight distribution. Packing heavy items at the bottom or on the outside of a pack shifts your center of gravity backward and downward. This strains your lower back and increases fall risk on technical terrain.
- Skipping the fit check. Straps that worked on a 30-minute test walk behave differently after six hours on a mountain trail. Adjust shoulder straps, hip belts, and sternum straps at the trailhead and again after the first hour.
- External carry of heavy items. Avoid external storage of heavy or swinging items to prevent loss, balance issues, or snagging in trail environments. Carabiners dangling from the outside of your pack look adventurous. They are actually a liability.
“The best pack is the one you forget you are wearing.” This only happens when weight is distributed correctly, straps are adjusted for the terrain, and every item has a logical place.
The outdoor gear checklist you build before a trip is only as good as the discipline you apply to it. Write the list, pack to the list, and then remove one item you are not certain you will use. Repeat until the pack feels right.
Key takeaways
Smart packing for outdoor activities requires matching gear to activity type, distributing weight correctly, and keeping critical items accessible at all times.
| Point | Details |
|---|---|
| Follow the Ten Essentials | The U.S. National Park Service framework covers all critical gear categories for emergency preparedness. |
| Use the three-zone system | Pack heavy items in the middle zone close to the spine to maintain balance and reduce fatigue. |
| Respect weight limits | Target 20% of bodyweight for short trips and no more than one-third for longer treks. |
| Organize with color-coded dry bags | Assign one color per gear category to find items fast without unpacking in bad weather. |
| Pack ruthlessly for families | Distribute group gear by load capacity and remove any item not needed daily or every other day. |
What I have learned from years of packing for the mountains
I have packed for hundreds of outdoor trips, from single-day scrambles in the Swiss Alps to week-long expeditions with groups of teenagers. The lesson that took me longest to accept is this: the urge to pack more is almost always fear, not preparation.
Early in my career leading outdoor programs, I watched participants arrive with packs so heavy they could barely lift them off the ground. By day two, they were handing gear to instructors or leaving items at camp. The weight they carried was not confidence. It was anxiety made physical.
What actually works is packing with a strict daily use test. If you will not use an item every day or every other day, it does not go in the pack. This sounds obvious. It is surprisingly hard to apply when you are standing in your living room imagining worst-case scenarios.
The other thing I have found consistently useful is testing your packed bag before any trip longer than a day. Put it on, walk up and down stairs, and lean forward. If the pack pulls you backward or shifts side to side, something is wrong with the weight distribution. Fix it at home, not at the trailhead.
For families especially, I recommend building a gear checklist together as a pre-trip ritual. Children who help pack their own gear take ownership of it. They know where their snacks are, they remember their sunscreen, and they are less likely to lose items on the trail. That level of engagement makes the whole trip smoother for everyone.
The best packing strategy is the one you can repeat consistently, refine after each trip, and explain to a ten-year-old. If it is too complicated to teach, it is too complicated to rely on when conditions get hard.
— Guillem
Get ready for your next adventure with Youngexplorersclub

Youngexplorersclub runs structured outdoor programs in Switzerland designed to teach exactly these skills to children, teens, and families. From mountain biking and climbing to survival skills and multisport adventures, every activity is built around real preparedness, not just fun. Participants learn how to prepare for outdoor trips, manage their own gear, and build the confidence that comes from genuine self-reliance in nature. If you want your child to develop these skills in a bilingual, expert-led environment, explore the weekly outdoor activities at Youngexplorersclub and see what a structured adventure program looks like in practice. Spaces fill quickly each season.
FAQ
What are the Ten Essentials for outdoor activities?
The Ten Essentials, as defined by the U.S. National Park Service, include navigation, sun protection, insulation, illumination, first aid supplies, fire starting tools, repair tools, nutrition, hydration, and emergency shelter. Every outdoor excursion, from a short day hike to a multi-day trek, should include all ten categories.
How heavy should a hiking backpack be?
Backpack weight should target 20% of your bodyweight for short trips and no more than one-third for longer treks. A 150-pound adult should carry no more than 30 to 50 pounds on an extended trip.
How do you keep a backpack organized on the trail?
Use color-coded dry bags assigned by gear category and follow the three-zone packing system: lightweight bulky items at the bottom, heavy items in the middle close to the spine, and frequently needed items at the top.
What should children carry on a family hike?
Children should carry only their personal hydration, snacks, a light insulating layer, and sunscreen. Group gear like tents and cooking equipment should be distributed among adults and older teens based on load capacity.
How do you avoid overpacking for outdoor trips?
Apply the daily use test: if you will not use an item every day or every other day, leave it behind. Build a written outdoor gear checklist before every trip and remove at least one item you are uncertain about before you leave home.