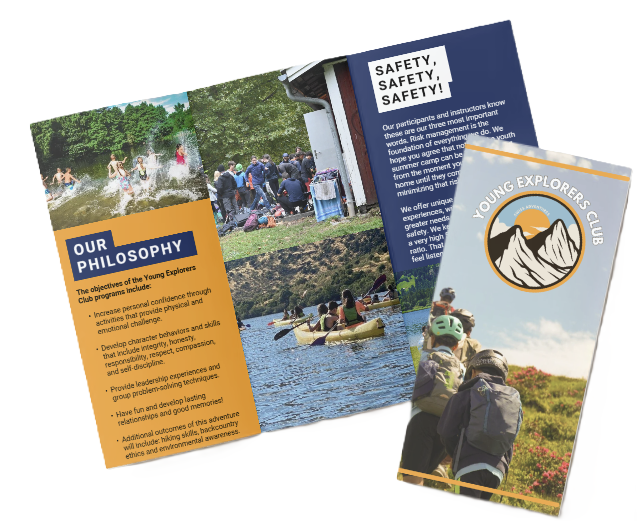
The Best Scrapbooking Ideas For Camp Memories
Turn digital photos into tactile camp scrapbooks: curated themed pages, archival prints at 300 DPI, and 3‑2‑1 backups for lasting memories.
Camp Keepsakes: From Digital Photos to Multisensory Scrapbooks
We turn fleeting digital photos into multisensory camp keepsakes that boost memory recall. Curate themed pages — cabin life, activities, friends — with short, dated captions and a few artifacts. They make stories vivid and easy to share.
Practical Workflow
Capture
For each activity, capture a wide–medium–close shot triad to provide context, detail, and emotion. Aim for consistent framing so pages read clearly.
Cull
Cull to the top 10–20% of images — quality over quantity. Select pictures that tell the story and pair well on a 12×12 spread.
Export & Proof
- Export prints at 300 DPI for archival-quality output.
- Order a proof print and review color, contrast, and cropping — don’t skip it.
- Make any adjustments, then finalize your print order.
Materials & Storage
Choose archival supplies: acid- and lignin-free paper and polypropylene or Mylar sleeves. Do not use PVC, which can degrade prints.
- Use acid‑ and lignin‑free pages and adhesives.
- Protect pages with polypropylene or Mylar sleeves.
- Store albums upright at a stable temperature and humidity.
Design Guidelines
Design with clear intent. Keep layouts consistent so stories are easy to scan and share.
- Standard: 12×12 spreads.
- Photos per page: one to six, depending on layout.
- Layout choices: grid or collage — pick one and stay consistent.
- Maintain a consistent color and type hierarchy.
- Add a Camper Facts box for context (dates, names, cabin).
Digital Preservation
Keep digital copies using the 3‑2‑1 backup rule: three copies, on two different media, with one offsite. This helps ensure pages last for decades.
Time, Budget, and Planning
Plan time and budget realistically. Expect simple pages to take 30–60 minutes each. Starter kits and mid‑range budgets work well for most projects.
Key Takeaways
- Use physical, themed scrapbooks with tactile elements and concise, dated captions to boost memory recall and storytelling.
- Shoot a wide–medium–close triad for each activity, keep roughly 10–20% of images, export at 300 DPI, and always order a proof print.
- Choose archival supplies — acid‑ and lignin‑free paper and polypropylene or Mylar sleeves; don’t use PVC. Store albums upright at a stable temperature and humidity.
- Design with clear intent: 12×12 spreads, one to six photos per page, pick grid or collage layouts, keep a consistent color and type hierarchy, and add a Camper Facts box for context.
- Preserve digital copies using the 3‑2‑1 backup rule. Plan time and budget realistically. Expect simple pages to take 30–60 minutes. Starter kits and mid‑range budgets work well for most projects.
Why Scrapbook Camp Memories
We, at the Young Explorers Club, know camp sparks a mountain of moments. About 11 million children attend summer camps annually in the U.S. (American Camp Association), so parents and kids need solid ways to preserve camp memories. Physical scrapbooks answer that demand by turning fleeting digital albums into a keepsake album that families can hold, share and pass down.
Emotional value and memory recall
A summer camp scrapbook does more than store photos. It creates a multisensory keepsake that combines touch and sight, and that sensory input strengthens memory retrieval. Handling a page, feeling a textured sticker or reading a handwritten caption makes stories more vivid than tapping through images on a phone. I recommend curating themed pages — cabin life, activities, friends — and adding short captions with dates. Those simple choices make storytelling around the kitchen table instant and rich.
Practical preservation tips
Use these steps to make a lasting camp scrapbook:
- Choose archival-quality prints and acid-free paper to protect photos for decades; done right, pages can last 50–100+ years.
- Label with names, dates and short notes so future readers understand context.
- Include small artifacts (ticket stubs, friendship bracelet knots) but mount them securely to avoid wear.
- Limit pages per child to a curated selection; fewer, well-told stories beat hundreds of unedited shots.
- Keep a digital backup of scans and a simple index to the album for quick sharing.
For guidance on collecting and organizing mementos, see document camp experience.
Pairing a printed keepsake album with digital backups gives the best of both: tactile memory reinforcement and searchable storage. We encourage printing highlights rather than entire camera rolls. That helps you tell clear stories and produce a summer camp scrapbook that feels intentional, useful and deeply personal.

Photo-Taking, Selection & Printing Essentials
We at the young explorers club use a simple shooting strategy that gives us layout flexibility. For every major activity we capture a wide establishing shot, several medium action frames, and tight close-ups of hands, badges, flames and faces. That wide–medium–close triad makes it easy to build dynamic spreads and mix detail with context.
Keep your selection lean. Aim to keep roughly 10–20% of the shoot for the scrapbook. From 200 images we’ll usually pick 20–40 strong contenders that tell the story, show variety, and include repeatable moments like group smiles or landmark shots.
Follow this quick workflow after camp:
- Import everything right away.
- Do a fast first pass to delete duplicates and blinks.
- Flag favorites and give 4–5 star ratings to keep the best.
- Batch-edit exposure and color once.
- Export final selections at 300 DPI for printing (sRGB, high-quality JPEG or TIFF).
- Always order one proof print before committing to a full run so you can check color and cropping.
For capture settings, favor a shutter speed that freezes action and a modest aperture for subject isolation. Shoot RAW if you plan heavy edits; otherwise high-quality JPEGs are fine. Keep an eye on white balance so your camp tones stay natural.
We prefer these editing and layout tools:
- Adobe Lightroom and Photoshop for control
- Affinity Photo for a lower-cost pro option
- Canva and Mixbook editors for fast photobooks
- Project Life App for pocket-style layouts
- Procreate on iPad for hand-drawn embellishments
For tips on how to present printed images at home check our guide to display camp photos with simple framing and grouping — see camp photos.
Print sizes, pixel dimensions and cost guidance
Use the following as quick references for 300 DPI exports and budgeting:
- Pixel dimensions at 300 DPI: 4×6 = 1200×1800 px; 5×7 = 1500×2100 px; 8×10 = 2400×3000 px.
- File expectations: export at 300 DPI, sRGB color profile, high-quality JPEG or TIFF; include a crop-safe margin for mats.
- Proofing tip: order one sample print to check color and contrast before printing a whole batch.
- Cost ballpark: 4×6 prints commonly run $0.10–$0.50 each; custom photobooks range about $20–$80+ depending on size and page count.

Essential Materials, Tools & Preservation Specs
We, at the young explorers club, pick materials that protect memories and make pages easy to build. I recommend sticking to standard sizes and archival supplies so pages look consistent and last decades. Keep tools simple at first and add specialty gear as your style evolves.
Page and photo sizes you should stock
Start with these common formats so prints and albums fit without trimming:
- 12×12 in — the standard scrapbook size that gives you room for layouts and mementos.
- 8.5×11 in — photo-album-friendly and great for printing on common home printers.
- 6×8 in — compact mini albums for travel or themed camp books.
- Photo prints: 4×6, 5×7, 8×10 for portraits and feature shots.
- Small prints: 2×2 and 3×3 are perfect for badges, group snaps, and collage accents.
Archival specs, tools, printing and storage
Choose acid-free, lignin-free, pH-neutral (~7.0) papers and adhesives. That combination prevents yellowing and chemical damage. For protective sleeves pick polypropylene, polyester (Mylar), or polyethylene. Avoid PVC at all costs; it releases chemicals that harm photos.
I rely on specific brands but keep flexibility. For albums and cardstock try We R Memory Keepers, Becky Higgins Project Life, and American Crafts/Bazzill. For adhesives and application tools use Tombow Mono Multi, a Xyron sticker maker, or a Scotch ATG dispenser. Photo corners and acid-free double-sided tape work well for delicate items. If you cut or die, the Cricut Maker, Cricut Explore Air 2, or Silhouette Cameo fit most needs. For inks and small embellishments use Ranger Archival Ink, Memento ink pads, enamel dots, washi tape, and brads.
Order prints from services such as Shutterfly, Mixbook, Mpix, Artifact Uprising, or Snapfish. Always order a proof before a large batch so colors and crop match your layouts.
Preserve albums with storage specs in mind. Keep temperature between 65–70°F (18–21°C) and relative humidity at 30–50%. Store albums upright on a shelf away from direct sunlight. Place silica gel packets in storage boxes to stabilize humidity. Don’t use attics or basements for long-term storage; those spaces swing temperature and moisture too much.
Follow the 3-2-1 digital backup rule for photos and scans. Keep three copies: the working files, a backup on a second medium, and one off-site copy. Use at least two different media types — for example, an external hard drive plus cloud storage — and keep the off-site copy somewhere outside your home.
Practical tips I use every time
- Mount fragile items with photo corners instead of adhesive.
- Label pages with lightfast pens and write dates on the back of photos.
- Use page protectors sized to your album to avoid shifting.
- Group similar ephemera on separate pockets so adhesives don’t transfer.
If you want ideas for displaying finished pages around the house, see display camp photos.

Layout, Design & Thematic Pages
We, at the young explorers club, start every scrapbook page with a clear intent: tell a moment or summarize a day.
Keep each 12×12 page to 1–6 photos. One large photo makes a strong single-photo focal page; use it to highlight a portrait, a sunset, or an awards moment.
Choose between grid and collage based on purpose. Use grid scrapbook design for event summaries and timelines. Grids read fast and scale well when you need to fit many photos. Use collage or mixed layouts for storytelling and mood pages. Layer small ephemera, tilted photos, and textured backgrounds to create movement.
Set a consistent color palette and type hierarchy. Pick two to three main colors: a dominant, an accent, and a neutral. Choose one script and one sans-serif font for headers and body; limit yourself to one or two type sizes per page. That keeps pages unified across the book.
Respect negative space. Aim for 10–25% white space on each spread to prevent clutter and to make focal elements breathe. Use margins and spacing grids so captions and embellishments align.
Plan book length by camp session:
- Day camp (half-day): 6–12 pages.
- 1-week overnight: 12–24 pages.
- 2-week session: 24–50 pages.
Follow this step-by-step 12×12 grid example to build a balanced page:
- Choose a dominant photo that covers about 40–60% of the page.
- Add 2–4 supporting photos at equal sizes to form a secondary grid.
- Place a journaling block sized for 50–150 words.
- Add one embellishment cluster (a badge, sticker, or small die-cut) near the title or photo corner.
This layout reads easily and gives you space for a Camper Facts box.
I also recommend creating a few single-photo focal pages sprinkled through the book to give the eye rest. When you finish pages, consider how you’ll present them at home; we offer tips on how to display camp photos that look intentional and proud.
Thematic sections to include and facts to record
- Cover & title page: camp name, year, session.
- Arrival & orientation: first impressions and photos.
- Cabin & roommates: cabin name/number and roommate notes.
- Daily activities: canoe, archery, hikes—group by activity or day.
- Campfire & awards: single-photo focal pages work well here.
- Counselor notes & quotes: short quotes, shout-outs.
- Goodbye & reflections: final thoughts and email keepsakes.
Include a “Camper Facts” box on each spread:
- Date(s) and camp location.
- Camper name and age.
- Cabin name/number and counselor names.
- Camp session and top 2–5 favorite activities.
- Space for a 1–3 line memory or quote.

Journaling Prompts, Captions & Interactive Keepsakes
We keep captions short and stories clear so memories read well years later. Our basic rule: micro-captions run 5–15 words; full story entries sit between 50–200 words. Use dates, full names, nicknames and awards every time you can.
For extra inspiration we point to camp journaling prompts that pair well with these formats. We also record exact dates and contexts whenever possible — that detail lifts a caption from vague to vivid.
Practical prompts, caption examples and pocket guidelines
- Prompts to use: Who was with you? What happened? When & where? How did you feel? What did you learn? Any funny quotes? Record exact dates, full names, nicknames, awards.
- Caption length guidelines: Micro-captions 5–15 words; full story entries 50–200 words.
- Micro-caption example: “Sam and the winning archery shot — July 12, 2025.”
- Full-entry example (3–4 sentences): “July 12, 2025 — Archery range at Pine Lake. Sam lined up, held his breath and hit the bullseye on his third try. The whole cabin cheered; he was shocked and proud.”
- Collecting accurate quotes: Ask campers or counselors for short voice memos, or hand out a brief end-of-camp questionnaire. We find voice memos capture tone and phrasing best.
- Keepsakes to include: name tags, merit badges, ticket stubs, maps, menus, pressed flowers or leaves, small friendship bracelet sections.
- Pocket sizes & formats: Use Project Life-style pages — standard 3×4 and 4×6 pockets — and business-card pockets (3.5×2 in) for small ephemera.
- Pocket page example: Choose a 4×6 protector with 3×4 pockets — insert one 4×6 photo as a background — place 3×4 journaling cards into pockets — tuck a badge into an empty 3×4 sleeve for depth.
- Safety & mounting: Mount fragile items on acid-free paper; avoid adhesives on delicate pieces. Use photo corners, archival sleeves, or short strips of removable mounting tape.
- Pressing leaves & flowers: Press items between blotting paper under a heavy book for 1–2 weeks. Store finished pressed pieces in sealed archival sleeves and avoid permanent lamination for precious items.
We recommend labeling pockets on the back with a tiny sticky note before final placement. That keeps dates and names from slipping away. If a keepsake is unusually thick, slice a 4×6 protector open and sew or tape a small pocket into the page spine for a clean, secure fit.
For interactive pages, add flip tags or fold-out journaling cards so kids can open stories. We also suggest a small envelope on the final page to hold loose voice memos on a USB or printed quote strips.
Time, Budget Estimates, Quick Checklist & Ready Templates
We, at the young explorers club, set realistic times so you actually finish a project. Simple layouts take 30–60 minutes per page. Elaborate spreads run 2–4 hours. If you’re short on time, block one evening per page and you’ll finish a 14-page album in two weeks.
Materials-only costs range $1–$10 per page for paper, stickers and adhesives. Printed photobook pages vary $0.25–$5 per page depending on the service. Example total budgets:
- Starter kit (album, basic tools, adhesives): $40–$120.
- Mid-range project (prints for ~50 photos, extra embellishments, album): $80–$250.
- Premium photobook (custom hardcover, 30–50 pages): $60–$150.
If you need to prioritize, start with a best-of minibook: 12–16 pages holding 20–40 photos. That keeps costs down and gives quick satisfaction. For image prep, export prints at 300 DPI in sRGB and pick an album size first (12×12 or 8.5×11). We recommend culling to the top 10–20% of photos before you order prints.
Schedule suggestion
Try this simple rhythm to stay on track:
- Photo selection — one evening.
- Layouts — one page per evening.
- Journaling — one or two short sessions.
That rhythm prevents burnout and keeps momentum. If you want ideas for how to display finished pages, see our guide to display camp photos.
Camp scrapbook checklist
Use this quick checklist before you start assembling pages:
- Gather all photos, name tags, badges and maps.
- Cull to top 10–20% of images; mark finalists.
- Choose album size and style (ring binder vs. hardcover).
- Order prints at 300 DPI, sRGB color profile.
- Group photos into sections (arrival, activities, friends, highlights).
- Pick adhesives and tools: photo-safe glue, corner mounts, scissors.
- Prepare journaling prompts and dates for captions.
- Create pockets for keepsakes and laminate small items if needed.
- Final pass: spell-check captions and flatten bulky items.
Templates you can copy immediately:
-
Cover/Title page — full-bleed photo, bold title, and a camper facts box (name, age, session dates, camp name). Keep typography large and readable.
-
Activity summary — four equal photos in a clean grid with a 30–50 word caption summarizing the activity or lesson. Use the caption to record a short quote or camper memory.
-
Keepsake pocket page — full 4×6 pocket background, two 3×4 mini pockets and one business-card pocket (3.5×2 in) for badges, a camp schedule or a small map. Seal edges and label each pocket for context.

Sources
American Camp Association — Camp Statistics
National Archives — Caring for Photographs
Library of Congress — Preservation: Photographs
Adobe Help Center — Image size and resolution
Mixbook — Image Quality and Resolution Guidelines
Shutterfly — Photo Printing Guide
Mpix — File and Image Requirements
Artifact Uprising — Photo Printing Tips
Image Permanence Institute — Photographs
Wikipedia — 3-2-1 backup strategy
American Institute for Conservation — Caring for Your Photographs
 13")