Engineering Challenges For Young Campers
Hands-on engineering challenges at camp: short design cycles, clear metrics, safety & accessibility to boost curiosity, teamwork and STEM
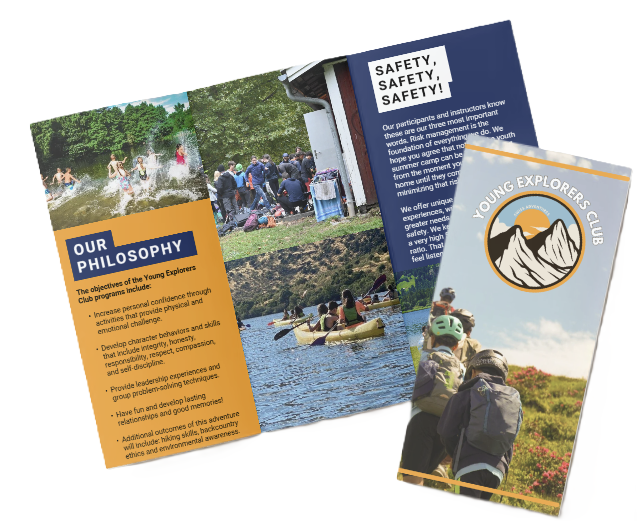
Engineering Challenges at Camp
We run engineering challenges at camp using short, hands-on design cycles (Ask, Imagine, Plan, Create, Test, Improve). These cycles spark curiosity and teamwork, and they sharpen measurement skills. Quick wins match camp attention spans. We pair clear numeric success criteria with fast data collection — short pre/post surveys, instructor checklists, and artifacts. We’re adding explicit safety and accessibility supports. That mix produces clear, short-term gains.
Key Takeaways
Short, concrete engineering tasks
Run brief, focused challenges that follow the engineering design process. These foster curiosity, persistence, and STEM identity by giving campers repeated opportunities to observe progress and iterate.
Define numeric success criteria and collect simple metrics
Pair challenges with clear, numeric success criteria and use scalable measurement tools:
- Pre/post surveys: Keep them to 3–5 items for quick administration.
- Instructor checklists: Fast, observational measures aligned to success criteria.
- Artifacts and photos: Capture evidence of learning and design choices.
Structure sessions by age and team size
Match session length and micro-tasks to developmental level. Recommended team and role structure:
- Teams of 3–5 participants to maximize participation.
- Rotate roles each round to build diverse skill sets and leadership experience.
- Adjust session length and task complexity by age group for attention and challenge balance.
Enforce safety and inclusion
Build explicit safety and accessibility supports into every activity:
- Require appropriate PPE and post supervision ratios: 1:10, 1:6, 1:4 depending on risk level.
- Set clear age limits for tool use and offer fine-motor alternatives where needed.
- Document safety procedures and train instructors on accommodations and de-escalation.
Control costs and scale effectively
Mix low-cost consumables with shared, higher-cost kits to keep per-camper budgets predictable:
- Buy in bulk and track per-camper costs.
- Prioritize reusable measurement tools and durable kits where possible.
- Monitor inventory and plan consumable replenishment to avoid surprises.
https://youtu.be/MO0jS3NJzys
Why Engineering Challenges at Camp Matter
We design engineering challenges because camps reach a huge audience and influence future choices. Eleven million kids attend summer camps each year in the U.S. (American Camp Association). That scale gives us a real opportunity to spark STEM interest early and often.
Research evidence that supports our approach
Informal STEM settings boost interest, motivation, and persistence in STEM and help kids form STEM identities (National Research Council, 2009). I draw on that finding when I build single-day projects that follow the engineering design process. We keep activities short, concrete, and visible so learners see progress fast. That approach aligns with evidence showing informal learning increases curiosity and persistence in ways formal lessons sometimes miss. I also prioritize teamwork and communication because group problem-solving strengthens identity and persistence in STEM.
We emphasize practical, hands-on experiences that teach measurement, data recording, and iteration. For examples of how outdoor settings amplify this kind of learning, see our piece on hands-on learning.
Short-term outcomes to expect and how to measure them
We aim for gains you can observe after a single multi-hour camp day. Expect immediate shifts in behavior and confidence. Below are the outcomes I track and the quick measures I recommend.
Immediate outcomes to look for:
- Increased curiosity: more question-asking during debriefs.
- Better teamwork: clearer roles and faster coordination.
- Hands-on skill growth: improved measurement, tool use, and prototype adjustments.
- Higher task-specific self-efficacy: willingness to try again after failure.
- Simple data practices: consistent recording and basic interpretation.
Quick measurement strategy I use:
- Short pre/post survey: Administer a 3–5 item pre/post self-efficacy survey (Likert 1–5) that campers complete at the start and end of the day.
-
Example survey items:
- “I can design a simple solution to a problem.”
- “I can record measurements accurately.”
- “I can work with a team to improve a design.”
- Instructor checklist: Add a short behavioral checklist for instructors that records observed teamwork behaviors and whether a team iterated on a design.
- Artifact collection: Collect one artifact per team (photo or short data sheet) to document hands-on skill growth.
I recommend these short-term measures because they capture immediate impact and are easy to scale across many campers. We use the engineering design process—Ask, Imagine, Plan, Create, Test, Improve—as the core learning objective and pair it with quick data collection so program staff can report clear gains after a single day.

Sample Engineering Challenges (detailed, measurable)
We, at the Young Explorers Club, always pre-test materials and record benchmark data so leaders can give campers realistic targets and quick feedback. Below are ten mini-problems with clear constraints, numeric success criteria, and compact rubrics you can use straightaway.
1) Bridge-building
Problem: design and build a bridge that spans a gap.
- Constraints: popsicle sticks (max 200), white PVA glue, string, binder clips, small weights.
- Time: 45–75 min.
- Group size: 3–5.
- Success criteria: span ≥ 30 cm and support ≥ 2,000 g; if unable, record maximum grams supported.
- Assessment: measure span in cm and max supported g. Rate design reasoning 1–4 (1 = poor explanation, 4 = clear force-path logic).
- Benchmarks: note pre-test results (typical simple truss designs support ~1.5–3 kg).
2) Egg-drop / Impact-absorption
Problem: protect a raw egg from breaking on impact.
- Constraints: cardboard, bubble wrap, tape, straws, cotton.
- Time: 45–60 min.
- Group size: 2–4.
- Success criteria: survive a 2 m drop with intact egg.
- Assessment: record pass/fail; calculate % success across groups. Rate cushioning design 1–4 and document hypotheses tested.
- Pre-test: drop platform checks and record common failure modes.
3) Water-filtration challenge
Problem: produce visibly clearer water from a turbid sample.
- Constraints: gravel, sand, activated charcoal, coffee filters, plastic bottles.
- Time: 45–60 min.
- Group size: 2–4.
- Success criteria: reduce visible turbidity by ≥ 50% or pass a simple clarity test; optionally measure flow rate (mL/sec).
- Assessment: weigh or photograph before/after samples, record mL/sec flow; score effectiveness 1–4.
- Pre-test: leaders should pre-test with the same turbid sample to set a baseline.
4) Solar oven / solar cooker
Problem: concentrate sunlight to heat or melt a food item.
- Constraints: pizza box kit or cardboard, aluminum foil, clear plastic wrap.
- Time: 60–120 min (sunny outdoor).
- Group size: 2–4.
- Success criteria: reach 60–85 °C on a sunny day; melt chocolate or warm food within 20–40 min.
- Assessment: log peak temperature with a thermometer and time-to-melt. Rate insulation and angle tuning 1–4.
- Benchmarks: record sunny-day benchmarks for your site.
5) Balloon-powered car / propulsion
Problem: propel a vehicle using only stored air.
- Constraints: plastic bottles, straws, skewers, bottle-cap wheels, balloons.
- Time: 30–45 min.
- Group size: 2–4.
- Success criteria: travel ≥ 10 m on flat surface; optionally measure speed (m/s) or distance.
- Assessment: run timed trials, average distances, and score drivetrain efficiency 1–4.
- Pre-test: determine typical distances on your surface conditions.
6) Wind turbine / small generator
Problem: convert wind into usable electrical output.
- Constraints: small DC motor (170–380 rpm), cardboard/plastic blades, LED, multimeter.
- Time: 60–90 min.
- Group size: 2–4.
- Success criteria: power an LED or produce ≥ 2 V open-circuit under fan/wind conditions.
- Assessment: record open-circuit voltage and LED illumination; score blade design and stability 1–4.
- Pre-test: use a fan to set expected voltages.
7) Simple circuits & coding
Problem: build and program a basic interactive circuit.
- Constraints: micro:bit or Arduino starter kit, LEDs, resistors, breadboard.
- Time: 45–90 min.
- Group size: 1–3.
- Success criteria: produce a functioning traffic light or sensor-based buzzer; measure reaction-time improvements if using sensors.
- Assessment: test repeatability, count successful runs, score code clarity 1–4.
- Tip: preload example sketches to avoid lost time.
8) Catapult / projectile accuracy
Problem: launch lightweight projectiles at a target.
- Constraints: craft sticks, rubber bands, bottle caps, marshmallows.
- Time: 30–45 min.
- Group size: 2–4.
- Success criteria: land projectile in a target 3–5 m away with ≥ 3/5 accuracy.
- Assessment: record hit rate, angle/force adjustments, and rate aiming method 1–4.
9) Tower / tallest-build challenge
Problem: erect the tallest free-standing tower.
- Constraints: newspaper, tape, string, cardboard.
- Time: 30–45 min.
- Group size: 3–6.
- Success criteria: build ≥ 50 cm tall and remain upright for 30 seconds.
- Assessment: measure height-to-base ratio, score stability and material efficiency 1–4.
10) Robotics demo (line follower or obstacle avoidance)
Problem: program a bot to complete a short course autonomously.
- Constraints: Sphero SPRK+, Ozobot Bit, or Makeblock mBot; tablet/smartphone.
- Time: 60–90 min.
- Group size: 2–3.
- Success criteria: robot completes a 5 m course autonomously; record number of iterations to success.
- Assessment: count iterations and time, rate sensor tuning and algorithm design 1–4.
Quick rubric and scoring checklist
Use the following criteria list when scoring each challenge:
- Structural/functional performance (0–4) — meets numeric objective.
- Measurement accuracy (0–4) — records and repeats measurements.
- Design reasoning (0–4) — explains choices and trade-offs.
- Innovation / efficiency (0–4) — clever use of materials and budget.
- Teamwork & documentation (0–4) — roles, sketches, and test logs.
Recommendation: leaders should supply basic instruments (digital scale, thermometer, multimeter, stopwatch, tape measure) and share site benchmarks with campers. For confidence-building and group dynamics tips, link classroom activities to outdoor challenges to reinforce concepts and teamwork.

Age Groups, Session Flow & Progressive Scheduling
Age bands and session lengths
- Ages 5–7 (early elementary): 20–30 minute sessions. Use simple materials and high adult support. Keep tasks tactile and repeatable.
- Ages 8–10 (upper elementary): 30–60 minute sessions. Introduce simple tools and small group design work. Encourage shared decision-making.
- Ages 11–14 (middle school): 45–90 minute sessions. Run fuller design cycles and add basic electronics or programming. Expect more independent trouble-shooting.
- Ages 15+ (high school): 60–120+ minute sessions. Support advanced builds, prototyping and data collection. Let students lead iterations and documentation.
- Attention span rule-of-thumb: plan roughly 2–3 minutes per year of age as a heuristic for focused work segments. Use that to set session pacing and breaks.
- Team size: 3–5 campers per team maximizes participation. Assign scaffolded roles like CEO/designer, builder and tester/recorder so quieter kids contribute.
- Session durations to remember: 20–30 / 30–60 / 45–90 / 60–120 minutes; session split minutes: 5–10 / 25–35 / 5–10 / 5–10.
We break longer engineering cycles into 15–20 minute micro-tasks (ideation, build, test, iterate). That keeps attention up and gives repeated wins. I expect teams to plan, prototype, test and tweak within each micro-task. Rotate roles each micro-task to build skills and ensure shared ownership.
Plan the microstructure for a standard 45–60 minute session like this:
- 5–10 minutes: challenge brief and a quick safety demonstration. Be direct and show one clear example.
- 25–35 minutes: build, test and iterate. Coach quietly; ask targeted questions to push thinking.
- 5–10 minutes: measurement and data collection. Record one or two clear metrics.
- 5–10 minutes: reflection and sharing. Have each team state one success and one lesson.
For 8–10-year-olds I recommend a 45-minute flow: 10 minutes intro and demo, 25 minutes build/test, 10 minutes share and reflection. That rhythm fits attention span and gives time for meaningful iteration.
Use clear performance targets to make challenges concrete. I design progressive daily schedules like this:
- Morning short challenge (30–45 minutes): quick warm-ups such as a balloon car or tower-build. Set simple goals (e.g., travel ≥10 m or stand ≥50 cm). These teach rapid ideation and immediate testing.
- Midday medium challenge (60–90 minutes): fuller design jobs like bridge-building or egg-drop. Define measurable targets (e.g., support ≥2 kg or survive a 2 m drop). Add a constrained materials list to encourage trade-offs.
- Afternoon extended challenge (90–180 minutes): long-form projects such as small robotics or a solar oven. Set stretch goals (e.g., reach 60–85 °C or complete a 5–10 m autonomous course) and require a short design log. These sessions push documentation and iterative debugging.
I keep scaffolding tight early and fade it as campers gain competence. For younger groups I give explicit success criteria and templates. Older teams get hypothesis statements and data sheets. That way, the design cycle becomes a habit rather than a mystery.
To boost creativity and team habits I link hands-on tasks to reflection prompts and quick data collection. For ideas on structuring exercises that strengthen inventive thinking see creativity and problem-solving.
Safety, Risk Management & Inclusion (explicit)
We set clear safety floors for every engineering station and enforce them as non-negotiable. We require minimum PPE at each workstation: safety goggles, heat-resistant gloves for hot glue or foil work, an accessible first-aid kit, and a nearby fire extinguisher. We label stations by risk level and post the allowed ages and supervision ratio at the entrance.
I assign supervision ratios based on activity risk and staff skill. Use these conservative targets as a baseline:
- Low-risk activities: 1 adult : 10 campers
- Medium-risk or active tool use: 1 adult : 6 campers
- High-risk stations involving fire, heat, or cutting: 1 adult : 4 campers
For example, hot-glue gun stations and any open-flame or heat-source station must operate at a 1:4 ratio. We also limit tool access by age: scissors and hot glue are allowed with supervision at ages 7+; craft knives, soldering irons, and power tools are restricted to ages 12+ and only with direct adult oversight.
I train staff on tool safety, hot glue safety, and emergency response before every session. Each session must include at least one staff member trained in first aid and emergency procedures. Staff briefings cover hazard recognition, extinguisher use, and rapid evacuation steps. We run short drills so adults react confidently instead of freezing.
I design stations to reduce common human errors. That means secure work surfaces, clamp options instead of handheld cutting, clear off switches for power tools, and designated cooling racks for hot items. We post simple, high-contrast visual instructions at each station and require hair tied back and no loose clothing. PPE stays on while tools are powered; kids remove gloves only after hands cool and tools are unplugged.
Checklist and training
Before any session begins, staff and campers sign off on a short checklist so responsibilities are explicit:
- PPE: goggles on, heat-resistant gloves available where needed.
- Clothing: no loose sleeves; long hair tied back.
- Tool limits: confirm age eligibility (7+ for scissors/hot glue; 12+ for soldering/power tools).
- Station readiness: fire extinguisher and first-aid kit accessible.
- Supervision ratio: posted and followed (1:10 / 1:6 / 1:4).
- Emergency contact: at least one staff certified in first aid present.
We reuse this checklist as a teaching moment. Staff talk through why each item matters and have campers practice safe tool handoffs and unplugging procedures.
I build inclusion and accessibility into every challenge so equity and universal design drive participation. Offer fine-motor alternatives such as larger grips, fastening systems instead of tiny screws, and single-step tool tasks. Provide tactile and visual instructions and allow paired programming so campers with differing abilities collaborate. I structure mixed-gender teams and highlight diverse role models to reduce stereotype threat. Ensure at least one low-tech option each day so kids can still contribute meaningfully if they opt out of higher-tech tasks.
I also plan for outdoor safety and sustainability. Encourage SPF 30+ sun protection and schedule hydration breaks—one water break every 45–60 minutes in warm weather. Check for ticks after outdoor sessions and teach campers how to inspect clothing and skin. Link hands-on engineering to safe outdoor practice and reinforce it with short safety talks about local flora and Leave No Trace care; see more on outdoor learning.
Finally, we audit and iterate. After each session we record incidents, near misses, and accessibility gaps. I use that data to adjust supervision ratios, retrain staff, and swap or retrofit stations so safety, tool safety, first aid, PPE, and accessibility remain active priorities.

Kits, Tools, Equipment & Budgeting
We plan gear around learning goals and per-camper cost limits. I keep measurement tools mandatory so kids collect real data and iterate. We favor reusable hardware and cheap consumables for rapid prototyping. I also balance a few higher-cost kits so teams experience electronics and robotics.
Essential supplies and sample kits
Below are the items I buy regularly and how I group them for activities:
- Consumables and low-cost items: popsicle sticks, masking tape, duct tape, cardboard, hot glue sticks, rubber bands, balloons, straws. Example bulk pricing: popsicle sticks (1,000 pack about $10–$25), hot glue sticks $5–$10 per 100, hot glue gun $8–$20.
- Electronics and programmable kits: micro:bit Go Kit, Arduino Uno Starter Kit, Raspberry Pi 4 (or Pico), Snap Circuits, Makey Makey. Typical kit price ranges: micro:bit kit $20–$40; Arduino starter $25–$50; Raspberry Pi varies by model.
- Robotics and STEM kits: LEGO Education WeDo 2.0, LEGO SPIKE Prime, Sphero SPRK+/Sphero Mini, Ozobot Bit, Makeblock mBot, VEX GO. Price examples: Ozobot $60–$100; Sphero $100–$150; LEGO WeDo around $160.
- Measurement tools: kitchen scale (0–5 kg), digital multimeter, thermometer (°C), measuring tape, stopwatch. I treat these as mandatory for any data-based challenge.
I often link a micro:bit into simple sensor projects to teach loops and sensing while keeping costs low: micro:bit.
Per-camper budget tiers I use
- Low-cost model: $3–$10 per camper per activity. This covers basic consumables and simple challenges.
- Mid-range model: $10–$30 per camper per activity. Includes microcontrollers or shared electronics components.
- High-end/kit model: $30–$100+ per camper. This covers robotics kits or a one-per-two-kids approach.
Sample budget I build from real runs
A bridge-building exercise for 20 campers, split into four groups:
- Popsicle sticks: $10
- Glue: $8
- Weights for testing: $10
Total ≈ $28, or about $1.40 per camper. I use this to show staff how inexpensive a high-impact engineering activity can be.
Practical purchasing and reuse tips
- Buy bulk: I buy consumables in bulk to reduce per-unit cost and keep a running inventory list.
- Solicit donations: I ask local schools for classroom leftovers.
- Coordinate community resources: Work with tool-lending libraries for meters and scales.
- Rotate kits: I rotate high-cost kits between sessions so robotics sets serve multiple groups across a week.
Tools and safety
I mandate at least one thermometer and a kitchen scale for experiments that measure temperature or mass. A digital multimeter is required when campers work with circuits. I train staff to inspect batteries and cables each morning and to store small consumables in labeled bins to avoid waste.
Choosing kits for learning outcomes
I pick kits by learning objective, not brand. Use microcontrollers (micro:bit, Arduino Uno, Raspberry Pi) when I want coding and sensing. Use Sphero, Ozobot, or LEGO WeDo when I want tangible robot behaviors and iterative design. Snap Circuits and Makey Makey are excellent for quick wins and classroom-friendly demonstrations.
Scaling and cost control
To keep per-camper costs down I:
- Mix activities: Combine low-cost consumable activities with occasional mid/high-cost kit sessions.
- Share kits: Share one expensive kit across multiple teams.
- Maintain kits: Schedule repair and cleaning days so kits last longer.
- Track spending: Track per-activity spend and adjust materials lists based on outcomes.
I recommend starting each season with a budget ledger that lists the kit price ranges (micro:bit $20–$40; Arduino $25–$50; Ozobot $60–$100; Sphero $100–$150; LEGO WeDo ~$160) and the three budget tiers. That ledger helps program leads plan activities that meet learning goals without surprising costs.

Assessment, Data Collection & Program Improvement
We, at the young explorers club, set clear assessment goals for every engineering challenge. Assessment emphasizes the engineering design process, iterations, and measurable outcomes so we can drive program evaluation and continuous improvement.
Data collection templates and tools
Below I list the minimum objective metrics, recommended measurement tools, a simple log sheet, a short pre/post survey, and a 4‑point rubric you can copy into session folders.
Minimum objective metrics to collect (units shown)
- Support weight — grams (g) or kilograms (kg)
- Distance — meters (m)
- Temperature — degrees Celsius (°C)
- Time to first working prototype — minutes (min)
- Iterations per team — count of prototypes
- Success/drop/survival rate — percent (%)
Collect at least three objective metrics per challenge (for example: support weight in g, distance in m, temperature in °C).
Measurement tools to have on hand
- Precision scale (g/kg)
- Tape measure or rangefinder (m)
- Thermometer (°C)
- Multimeter (V)
- Stopwatch or phone timer (min)
- Simple digital camera or tablet for photos and documentation
Simple log sheet fields
(use this as a paper or spreadsheet template)
- Team name
- Start time
- Iterations (count)
- Time to first working prototype (min)
- Best metric (numeric with unit)
- Success rate for the trial (%)
- Notes (design changes, materials)
- Safety incidents (Y/N + brief detail)
Short pre/post self-efficacy survey
Likert 1–5; three to five items recommended:
- I feel confident building simple prototypes. (1–5)
- I enjoy solving engineering problems. (1–5)
- I can test and improve a design after feedback. (1–5)
- I understand how to measure performance metrics. (1–5) — optional fourth item
Sample rubric — 4‑point scale (1 = novice, 4 = advanced)
-
Teamwork:
- 1: Rare cooperation; unclear roles.
- 2: Some collaboration; roles shifting.
- 3: Consistent cooperation; clear roles most of the time.
- 4: Fully coordinated; team anticipates each other.
-
Design reasoning:
- 1: No clear rationale for choices.
- 2: Limited reasoning; few cause-effect links.
- 3: Logical choices with evidence from tests.
- 4: Strong reasoning; iterative decisions based on data.
-
Testing & documentation:
- 1: No tests recorded.
- 2: Tests done but poorly documented.
- 3: Tests logged with basic analysis.
- 4: Systematic testing, clear logs, photos, and conclusions.
-
Final performance (use objective metrics):
- 1: Did not meet basic criteria.
- 2: Partially met target; inconsistent results.
- 3: Met challenge goal reliably.
- 4: Exceeded expectations; reproducible high performance.
We use the log sheets and rubric to produce quick visuals each day. Simple bar charts of best performance per team and scatter plots of iterations versus final metric reveal patterns fast. Staff run short debriefs after each session to capture logistics notes and any safety incidents while memories are fresh. Weekly aggregated reporting should include average iterations per team, median time to first working prototype, and percent success toward challenge goals; those numbers guide immediate curriculum adjustments.
When staff review results, they look for tradeoffs (fewer iterations but higher success rate, or lots of prototypes with little performance gain). I recommend prioritizing one action per week: adjust materials, change time limits, or add a mini‑lesson on testing techniques. We also cross‑reference objective metrics with observational notes on engagement and learning—linking performance metrics to observations about outdoor learning helps justify shifts in session structure.
Keep data capture simple and fast. Clear fields, short surveys, and a tight rubric let staff spend time coaching rather than filling forms. Continuous data collection and weekly reflection close the loop so our engineering challenges yield better learning, stronger prototypes, and measurable growth in confidence.

Sources
American Camp Association — Camping Industry Facts and Trends
Afterschool Alliance — America After 3PM
Child Development Institute — Attention Span by Age
TeachEngineering — Free K-12 Engineering Curriculum
Science Buddies — Project Ideas, Answers, & Tools for Students and Teachers
LEGO Education — LEGO Education WeDo 2.0 Core Set
micro:bit Foundation — micro:bit
Arduino — Arduino Official Starter Kit
Raspberry Pi Foundation — Raspberry Pi Pico
Sphero — Sphero SPRK+
Ozobot — Ozobot Education (Bit)
National Science Foundation (NCSES) — Science & Engineering Indicators
AAUW — Why So Few? Women in Science, Technology, Engineering, and Mathematics