How To Preserve Camp Memories For Years To Come
Preserve camp memories: make lossless masters and share copies, use 3-2-1 backups, embed metadata, scan photos 300-600 DPI, audio 44.1-48 kHz
Preserving Camp Memories as Archival Assets
We preserve camp memories by treating originals as archival assets. Start by creating a lossless master and a compressed share copy. Keep three copies on at least two different media, with one stored offsite (3‑2‑1). Embed consistent metadata and filenames at ingest so items stay searchable. Prepare before camp: power, storage, and permissions. Capture and digitize to archival targets: photos 300–600 DPI; film 2400–4000 DPI; audio 44.1–48 kHz. Then follow a simple workflow—capture → organize and add metadata → create masters → backup locally → backup offsite. We’ll run regular integrity checks and refresh media on a schedule.
Before Camp: Prepare
Preparation reduces risk and speeds ingest. Confirm permissions, power plans, and storage capacity before arrival.
- Power: chargers, spare batteries, and power banks.
- Storage: formatted drives, extra SD cards, and a clear folder structure template.
- Permissions: model releases and parental consent documented.
- Metadata templates: IPTC/EXIF/XMP fields and a naming convention ready to apply.
- Identifiers: slate or simple ID system for interviews and candid clips.
Capture and Digitize Targets
Set capture targets to meet archival standards so masters remain useful long-term.
- Photos: aim for 300–600 DPI for prints and scanned materials.
- Film: scan negatives/slide film at 2400–4000 DPI depending on grain and format.
- Audio: record and digitize at 44.1–48 kHz minimum; prefer lossless formats for masters.
Simple Workflow
Follow a consistent sequence so items are ingest-ready and traceable.
- Capture: record with clear IDs and metadata notes.
- Organize and add metadata: apply IPTC/EXIF/XMP fields and a strict YYYY‑MM‑DD filename convention.
- Create masters: generate lossless files (TIFF, DNG, WAV, FLAC, MOV/ProRes).
- Create share copies: make compressed versions (JPEG, MP4) for distribution.
- Backup locally: copy to a local redundant storage system.
- Backup offsite: ensure one copy is geographically separated.
Storage and Backup Strategy
Adopt the 3‑2‑1 approach and maintain regular validation and media refresh.
- 3‑2‑1 rule: three copies, two different media types, one copy offsite.
- Formats: keep lossless masters (TIFF/DNG, WAV/FLAC, MOV/ProRes) and one compressed sharing copy (JPEG/MP4).
- Checksums: verify backups with checksums and run integrity checks regularly.
- Refresh schedule: replace consumer drives every 3–5 years and re-copy archives every 5–10 years.
- Test restores: perform at least annual restore tests to confirm backups are usable.
Key Takeaways
- Follow the 3‑2‑1 backup rule: three copies, two different media types, one copy offsite.
- Keep lossless masters (TIFF/DNG, WAV/FLAC, MOV/ProRes) and make one compressed sharing copy (JPEG/MP4).
- Embed IPTC/EXIF/XMP metadata, use a strict YYYY‑MM‑DD naming convention, and keep a predictable folder structure.
- Prepare gear and permissions before camp. Capture candid clips and short interview segments with clear identifiers. Aim for the recommended DPI and sample-rate targets.
- Verify backups with checksums and test restores annually. Replace consumer drives every 3–5 years and re-copy archives every 5–10 years.
https://youtu.be/oBnHz4C4SfI
Core Preservation Principles and Quick Workflow
We follow the 3-2-1 backup rule: keep 3 copies, on 2 different media types, and 1 copy offsite. I keep one original if I have prints (copy 1), a local external drive or NAS as copy 2, and a cloud backup or offsite NAS as copy 3. I always create a master (lossless) + one compressed copy for sharing.
Keep capture targets realistic and archival-grade. For photos scan at 300–600 DPI and scan film at 2400–4000 DPI. Record audio at 44.1–48 kHz and 16–24 bit. Use archival formats for masters: TIFF or PNG for images, WAV or FLAC for audio. Create JPEG or MP4 derivatives for easy sharing.
Use two media types to reduce correlated failures. A hard drive can suffer mechanical failure; a cloud account can be lost or hacked. Pairings that work:
- HDD + cloud
- SSD + optical / M-Disc
- NAS + offsite NAS
Embed metadata early. Add IPTC and EXIF fields to images and use consistent file naming. I batch-write captions, dates, and location data so search and future sorting stay simple. If you prefer step-by-step tips on how to digitize memories, see our digitize guide.
Store physical originals in acid-free sleeves and archival storage boxes. Label boxes with dates and a short inventory. Keep prints and negatives in a cool, dry spot away from sunlight.
Quick workflow
- Capture (or collect): gather prints, negatives, tapes, and digital files. Photograph fragile prints if a scanner isn’t available.
- Organize and add metadata: apply IPTC/EXIF, consistent folder structure, and readable file names.
- Create master files: save lossless archival formats at target DPI/sample rates. Create a master (lossless) + one compressed copy.
- Backup locally: copy masters to an external drive or NAS (different media than originals).
- Backup offsite: push a copy to cloud storage or an offsite NAS with versioning and account recovery enabled.
- Create shareable exports/prints: generate compressed files for sharing and order prints on archival paper if you want long-term physical copies.
Key facts at a glance:
- 3 copies, 2 media, 1 offsite
- Photos: 300–600 DPI; Film: 2400–4000 DPI
- Audio: 44.1–48 kHz, 16–24 bit
- Create a master (lossless) + one compressed copy

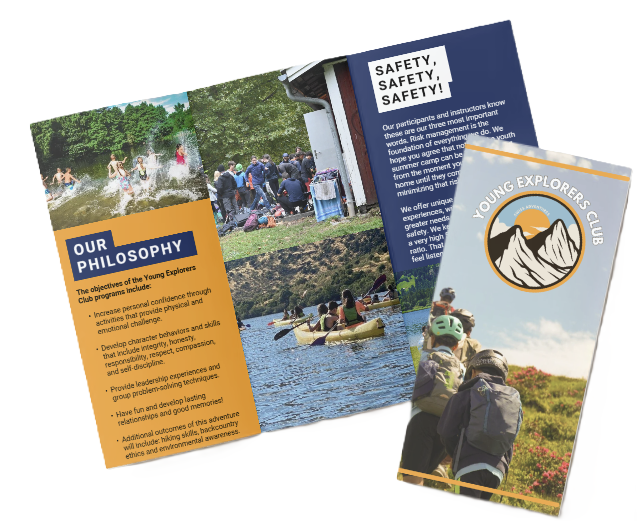
Prepare Before Camp and Capture Better Photos & Video
We, at the young explorers club, pack smart so memories survive the trip and editing stays easy. I prioritize power, storage and permissions before day one so I can focus on stories, light and sound when I’m at camp.
Pre-camp checklist
- Extra batteries and chargers: bring spares for every camera and phone; include extra batteries for point-and-shoots and action cams.
- SD cards and USB sticks: carry several formatted SD cards; label each one.
- Storage capacity planning: carry 2–3× expected storage (for example, if you expect ~20 GB per week bring 64–128 GB spare).
- Disposable or instant cameras: include one for candid keepsakes and tangible prints.
- Photo release and permissions: obtain written or recorded consent for minors; get signed releases from guardians where required.
- Labeling supplies: permanent markers and a printable sticker sheet for physical and digital media.
Estimate file sizes so you don’t run out: the average smartphone photo is about 2–5 MB, while an average smartphone video minute at 1080p H.264 is approximately 60–130 MB. Use those figures to calculate true storage needs.
I follow simple capture rules on site. I prioritize natural light and steady framing. I shoot candid moments to tell stories, then add a quick posed shot with name or nametag visible. For interviews I record short clips — video interviews: 30–90 seconds per camper — and use an external mic to keep audio clean.
Interview script (quick prompts)
- Full name
- Age
- Cabin/group
- Favorite camp activity
- Favorite memory
- Date
That short script speeds editing and improves metadata.
For technical targets I save RAW when available for maximum editing headroom, or high-quality JPEG if RAW isn’t an option. I keep video masters at native capture resolution and note capture resolution in my metadata so exports match intended use. I tag files with EXIF details and use a simple filename convention like 2026_CampPine_Session1 to speed searching later.
Recommended gear I carry
- Phone with an external mic for quick interviews.
- Point-and-shoot or DSLR with RAW enabled.
- Lightweight tripod or gimbal for stable shots.
I label physical and digital storage clearly and add basic metadata after transfer. For tips on displaying and organizing those images at home, see this short guide to camp photos and this page on how to document camp.

Digitizing Printed Photos, Film, Video, and Audio
We, at the young explorers club, follow clear standards so your camp memories last. Start scans for prints at 300–600 DPI: use 300 DPI for standard prints and 600 DPI for small prints or when you plan to enlarge. Scan negatives and slides at 2400–4000 DPI to capture the grain and detail.
Handle originals carefully. Clean surfaces gently with a microfiber cloth or air blower before any scan. Choose the right DPI, set color to 48-bit if the scanner supports it, and produce a lossless master file. I save masters as TIFF or DNG, then make a compressed share copy as JPEG for email or social media.
Follow this scanning workflow in order:
- Clean surface gently
- Choose appropriate DPI
- Scan in 48-bit color if available
- Save master as TIFF or DNG
- Create a compressed copy (JPEG)
For film and tape I transfer analog video at its native resolution whenever possible. Capture VHS at roughly 720×480 NTSC using a reliable capture device. Use dedicated capture hardware for Hi8 and other consumer camcorder formats; digitize those tapes as soon as you can and keep the original tapes stored cool and dry after transfer. I recommend capturing video to a high-bitrate MP4 or MOV for everyday access, and preserving an archival master in a lossless format if your capture tool supports it.
Audio deserves the same care. Capture archival audio to WAV or FLAC at 44.1–48 kHz and 16–24 bit. That range balances file size and fidelity and lets you future-proof voice recordings, camp songs, and counselor messages.
Manage files with clear, consistent names and a batch-naming scheme so you can find items years from now. Capture first to a local hard drive for speed, then copy masters to at least one offline archive. Preserve the originals at all times and keep a compressed working set for sharing.
Hardware I recommend depends on the media and budget. Below I list practical options that scale from entry-level to pro and work well for camp archives.
Recommended digitization hardware
Here are devices I use and recommend:
- Epson Perfection V600/V850 — flatbed scans prints and small originals well
- Canon CanoScan series — good entry-level photo scanners
- Plustek OpticFilm — built for negatives and slides (high DPI)
- Elgato Video Capture — simple VHS capture to USB
- Blackmagic Design capture devices — higher-end video capture
- Zoom H1n/H4n — portable audio capture for WAV masters
For tips on displaying and sharing scanned items, check our page about display camp photos.
File Formats, Metadata, Organization, Naming, and Tagging
We, at the young explorers club, preserve camp memories by choosing formats that protect image, audio, and video fidelity while keeping easy-to-share copies for family and friends. For archival masters use lossless or raw formats; for example:
- Images (masters): TIFF for lossless images, DNG for archival raw.
- Audio (masters): WAV or FLAC.
- Video (masters): MOV/ProRes or uncompressed (low-compression) video masters.
For sharing, make one compressed copy per master: JPEG (sRGB) for photos and MP4 (H.264 or H.265) for video. Always keep at least one lossless archival master plus one compressed sharing copy.
Use metadata standards to capture context and rights. EXIF holds camera and capture data. IPTC or XMP store captions, keywords, copyright, geolocation, and people tags. Populate both embedded metadata and an external catalog so nothing gets lost when files move.
Populate these recommended metadata fields
- Title: short, searchable name (include camp and activity).
- Description/Caption: one to three sentences with highlights or notable actions.
- Date: full capture date (YYYY-MM-DD recommended for file naming).
- Location: camp name plus GPS when available (e.g., CampPine, 44.123N/71.234W).
- Session: identifier if the camp runs multiple sessions.
- Activity: activity type (canoe race, bunk performance).
- Participants: full names of people visible in the file.
- Photographer: credit or source of the image/audio/video.
- Copyright/Usage Notes: rights and sharing rules.
We recommend you embed EXIF and IPTC/XMP fields together. That keeps camera data and descriptive text synced across platforms and future-proofs searches.
Follow a strict naming convention and folder structure so files stay findable even without software. Start every filename with YYYY-MM-DD to force chronological sorting. Use this pattern: YYYY-MM-DD_CampName_Session_Event_Person_Version.ext. Example: 2026-07-12_CampPine_Session1_CanoeRace_JSmith_v1.tif. Show a master/share pair like this: 2026-07-12_CampPine_CanoeRace_master.tif and 2026-07-12_CampPine_CanoeRace_share.jpg. Keep the version suffix when you edit to avoid overwriting masters.
Organize folders in a predictable tree. An effective example is: /Camp Memories/2026/CampPine_Session1/Photos, Videos, Audio, Documents. Place masters in the relevant media folder and keep a matching “Shares” subfolder for compressed files. We use consistent spellings and abbreviations to avoid duplicate branches.
Adopt a tagging strategy that speeds retrieval. Tag by year, camp, session, activity type, and people. Keep one controlled vocabulary list—a master tag sheet—that lists approved tag terms, spelling, and abbreviations. Enforce the sheet when two or more people add tags. That reduces duplicates (e.g., “Canoe” vs “Canoeing”) and keeps searches reliable.
We rely on these tools for bulk operations and catalog work:
- Adobe Lightroom for cataloging and shared exports.
- Adobe Bridge for visual batch checks.
- ExifTool for powerful scripted metadata edits.
- Bulk Rename Utility for fast file renames.
- DigiKam for open-source tagging and batch tasks.
Use ExifTool when you need scripted, repeatable metadata updates across thousands of files. Use Bulk Rename Utility to apply the YYYY-MM-DD naming convention in one pass.
Practical tips you can apply today:
- Create and store masters before editing.
- Add the recommended fields (date, camp, session, activity, names) at ingest.
- Run a quick consistency check against your master tag sheet monthly.
- Export one compressed sharing copy for each master to share with families.
For additional ideas on how to document camp memories, see this guide on how to document your child’s camp experience.
Backup Strategies, Hardware Recommendations, and Long-Term Maintenance
We, at the young explorers club, insist on the 3-2-1 backup rule: three copies, on two different media, and one copy offsite. Our plan mixes local speed with offsite safety:
- Primary master on a Synology NAS.
- Second copy on an external drive kept at home.
- Third copy in cloud storage or an external drive in a safe deposit box.
We run backups after any big event—end of session, photo dump, or video export—and otherwise at least monthly or quarterly depending on volume. We verify each backup with checksums (MD5 or SHA-256) and run periodic integrity checks. Annual verification is non-negotiable, and we test restores at least once a year to confirm recoverability. Use ExifTool to extract metadata and md5deep or sha256sum to build and compare checksums for large batches.
Drive and media lifespan matters more than brand claims. Expect consumer external HDDs to have a typical lifespan of around 3–5 years with constant use. SSDs often last 5–10+ years depending on write cycles and environment. M-Disc carries a manufacturer claim of longevity up to about 1,000 years (M-Disc manufacturer claim). Standard archival Blu-ray media can last roughly 25–100 years depending on type and storage. LTO tape offers about 15–30 years of shelf life. Because formats shift and media degrade, we replace consumer external drives every 3–5 years and re-copy archived data every 5–10 years to avoid format obsolescence.
Five-year maintenance plan
Below is the maintenance rhythm we follow to keep camp memories safe and accessible:
- Year 1: Verify backups monthly after big sessions; build checksums for new archives and store checksum files with the master copy.
- Year 2: Run full restore tests on a selection of files and confirm cloud/offsite integrity.
- Year 3: Examine media health using SMART reports for HDDs/SSDs; refresh any drives that show errors.
- Year 4: Re-check checksums on a 1–2 year cadence; update metadata with ExifTool and tidy filenames with Bulk Rename Utility.
- Year 5: Perform a full migration: confirm formats, re-copy to fresh media, and audit offsite backups for accessibility.
Hardware, services, and utilities we recommend
We pair cloud and local solutions for true offsite backup. For cloud services we often use:
- Backblaze (Personal backup and B2).
- Google One, iCloud Photos, Amazon Photos, Dropbox, Microsoft OneDrive, or CrashPlan depending on family preference and platform.
For local hardware we recommend:
- Synology NAS or QNAP NAS as masters.
- WD My Passport or Seagate Backup Plus for budget external drives.
- Samsung T5/T7 SSDs for fast portable copies.
The Samsung T7 gives great read/write speed for transfers; we use it for session-level quick copies before final archiving.
For long-term archival media choose M-Disc or archival BD-R discs, and consider LTO tape for very large institutional archives. Tools we use for verification and management include:
- ExifTool
- md5deep / sha256sum
- Bulk Rename Utility
We also document each archive—what’s on each drive, checksum lists, and restore instructions—so anyone can recover files years from now.
If you want to show and preserve the photos you can use our guide to display camp photos at home and tie that into your backup catalog so displayed images always link back to master copies.
Physical Keepsake Preservation, Creative Projects, Privacy, and Practical Checklists
We, at the young explorers club, recommend starting with archival supplies: use acid-free and lignin-free paper and boxes, polyester (Mylar), polypropylene, or polyethylene archival sleeves, and archival-quality photo albums. Use archival pens such as Pigma Micron for captions and dates. Handle items with clean hands or cotton gloves for fragile photos, avoid non-archival adhesives, and write on mounting backing or cards rather than on photo surfaces.
Control storage conditions to extend life. Aim to store keepsakes at ~60–70°F (15–21°C) and 30–50% relative humidity and keep items out of attics or basements that swing in temperature and moisture. Pick interior closets over attics, and tuck silica gel packets inside boxes to curb moisture. Limit light exposure by using opaque boxes and keep albums closed when not in use.
Turn preserved items into projects that get enjoyed. Consider a photo book or printed yearbook, canvas prints, framed collages, or a quilt made from camp shirts. For digital-first options, build a slideshow or a short documentary-style video, assemble podcast-style interview compilations, or add QR code keepsakes that link to clips and interviews. Interactive timelines like StoryMap work well for multi-year records. For high-quality production, check vendors such as Artifact Uprising and Mixbook for photo books, Mpix and Nations Photo Lab for prints, and Vistaprint or local print labs for merch and specialty items. I also suggest linking physical displays to digital archives—display camp photos on a shelf or wall and add a QR code that plays a slideshow.
Keep creative projects practical. Produce a short 3–10 minute highlight video for each session; that length fits attention spans and archives neatly. A sample timeline works well:
- 0:00–0:30 title + dates
- 0:30–3:00 top camp moments
- 3:00–5:00 interviews and memorable quotes
- 5:00–7:00 activity montage
- 7:00–end credits and acknowledgments
Respect privacy and secure permissions. Obtain a written photo release from guardians for underage campers, decide whether albums are private-group, password-protected, or public, and practice data minimization. Don’t publish sensitive identifiers and remove geotagging or location metadata before sharing; use platform settings or tools like ExifTool to strip coordinates. Limit visible personal details in captions and always confirm consent before posting.
Quick starter checklist and time budgeting
- Collect physical and digital items, prioritize fragile originals.
- Digitize critical items first; scanning throughput typically runs ~50–200 photos per hour depending on prep.
- Name files and add tags immediately after capture.
- Create a 3–10 minute highlight video per session.
- Follow a 3–2–1 backup: three copies, two different media, one offsite.
- Schedule an annual “Camp Memories Day.”
- Budget about 1–2 hours per camp week for organization and processing.

Sources
Image Permanence Institute — Storage Environments for Photographs and Paper
Library of Congress — Guidelines for Digitizing Cultural Heritage Materials
National Archives and Records Administration (NARA) — Preservation and Storage
Backblaze — Hard Drive Test Data
Digital Preservation Coalition — Digital Preservation Handbook
IASA — Guidelines on the Production and Preservation of Digital Audio Objects
Adobe — Metadata in Lightroom Classic (EXIF/IPTC/XMP)
Epson — Epson Perfection V600 Photo
Western Digital — WD My Passport